If I may chime in.
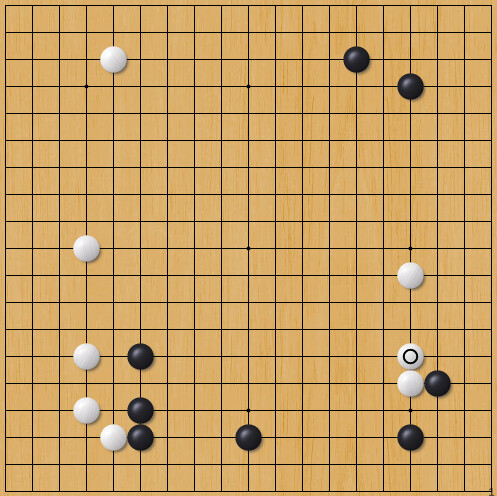
Figure 1: Move 16, first mistake by White.
At move 16 you made your first mistake. I have nothing to say about moves 1-15, you played good moves.
At move 16 however, you pulled back with a nobi on the fourth line, instead of a more standard hane on the third line.
Figure 2: Variation
Figure 2 shows a more standard variation. Instead of pulling back on the fourth line, you block on the third line at move 16. Look at the two stones 16 and 18 in this variation: they are two spaces away from your middle-side stone. This makes a nice two-space extension that is a good basis for life for your group. Contrast that with the game, Figure 3, where the two stones 18 and 20 are only one space away from the middle-side stone. Now you are a bit cramped, which will make it harder to make life for your group, and will get you a smaller territory.
Figure 3: Moves 16-20.
And then in the game, instead of playing a kosumi on the south side like I suggested, Black plays a pincer at move 21.
Figure 4: Moves 21-22.
Figure 4: instead of playing the kosumi at A, Black plays the pincer at 21. If Black had played at A like I suggested, then White would play at B, and make a nice big life-base for the White group on the east side. Black is trying to get just a little bit more and to squeeze your group even further, leaving you with less territory and making it harder for you to make life. And you answer at 22, a move sometimes called “the armpit move”, a third-line move diagonally below an opponent’s fourth-line stone. This is generally a bad shape. You’re going to end with a bad shape, and your group is going to be very cramped, and Black will have sente to go back to play the kosumi on the south side: Figure 5.
Figure 5: Variation. If Black plays like this, White is very cramped.
A way for White to resist is the variation of Figure 6: since Black didn’t play the kosumi on the south side, you “punish” Black by playing there yourself. And most importantly, you do not play the cramped armpit move under the black stone.
Figure 6: Variation. White resists by pressing down on Black’s south side.
With the variation of Figure 6, the White group on the east side is pretty solid, and Black’s moyo on the south side is completely erased. This is much better for White than the variation of Figure 5.
In the game, you were lucky. Black made a big mistake and didn’t choose the variation of Figure 5. Up to move 30, this is all very good for you. But then at move 32 you make a big mistake.
Figure 7: Moves 22-32. This is extremely good for White up to move 31, but move 32 is a mistake.
The mistake of move 32 is not of a strategic nature, but of tactical nature. At move 32 you played a hane. Every time you play a hane, you must ask yourself: what happens if my opponent cuts? Very often, the cut is bearable and hane is the best move. But sometimes, the cut is insufferable and hane simply doesn’t work. This is the case here. You should have read that. Black cuts, captures a White stone, saves four Black stones, and closes off a large northeast corner. Instead, if you had read that hane didn’t work, you would have pulled back on the third line, and Black would have had either to abandon the four Black stones, or to painfully crawl on the second line to save them, which would be horrible for Black.
Figure 8: Variation. White pulls back with 1 instead of the hane at move 32.
Reasonably, Black would abandon the four stones. Saving them by crawling leads to a horrible result. So, this was a reading mistake by White. Don’t play hane when you can read that hane doesn’t work.
In the game, you took sente at move 38. Good choice. The local sequence on the east side is over. White is not alive yet, but the White group forms a long wall that faces towards the center, so it’s hard to attack for Black. You can leave it. Your move 38 on the north side is very good.
Your next mistake is at move 44.
Figure 9: Moves 38-44.
The situation here on the west side is similar to the situation we encountered on the east side, but with Black and White reversed. Now your objective is to block Black’s extensions and make Black feel as cramped as possible. With that in mind, move 44 should be a hane.
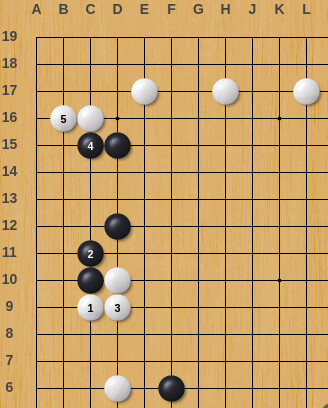
Figure 10: Variation. Keeping Black’s group as small as possible with a hane.
Instead, in the game, you sacrifice one stone for no reason. This sacrifice results in a Black ponnuki. A ponnuki on the fourth line is extremely good for Black. Immediately the Black group is alive and well, and has influence towards the center. There will never be any pressure on the Black group again. Black can relax now. And, because Black no longer has any weak group, it will become much easier for Black to attack the White group on the east side. Do not offer ponnuki to your opponent like that!

Figure 11: Move 55.
After Black move 55, the Black group is completely alive. This means that the local sequence is over. Time to take the initiative: keep sente, play elsewhere. Play where the gains could be higher.
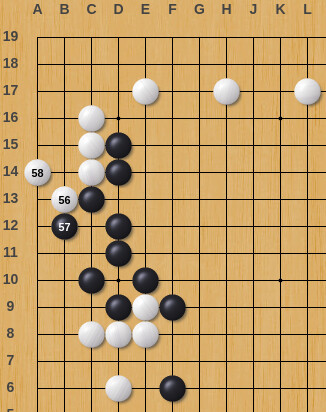
Figure 11: Moves 56-58.
Oops! You played a second-line move. Move 58 is completely gote. The Black group is already alive. The second line is extremely small. Black can completely ignore your move 58, and take sente, and play a big move elsewhere. Do not play gote second line moves, this early in the game!!
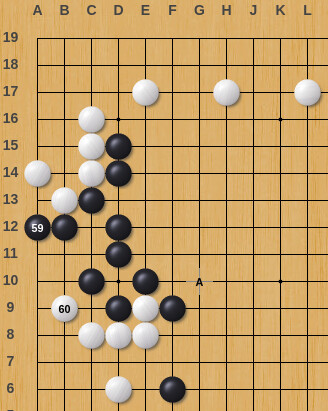
Figure 12: Moves 59-60.
You’re lucky: Black wasted a move by playing move 59 on the first line. This is an extremely small endgame move, completely off-topic at this stage of the game. Now White can take the initiative and play a big move elsewhere. Except… Oops! You did it again. You played move 60 locally, a gote endgame move. You just lost the initiative again! Black is already alive, so move 60 is not sente. The only weakness is Black’s shape is the cut at F10, so Black can for instance answer your small second-line move 60 by playing at A, a nice tiger-mouth which is a huge center move at this point in the game. Or Black could tenuki completely and play the kosumi at P4 to develop the south side.
And then after move 64, Black resigned for no apparent reason. Black is ahead in territory and doesn’t have any weak groups, so the game is rather good for Black at this point, but Black decided to resign anyway. You win!


